
Customize Your Kitchen Design
Customize Your Kitchen Design
It can be overwhelming at first when entering the kitchen planning tool, but don't worry! We've created the ultimate design guide so you can create your own kitchen faster than you can clean one. Let's go over some of the basic features.
How to Change Your Collection within the Kitchen Planner
Edit Base Cabinets
Edit Wall Cabinets
Edit Tall Storage Cabinets
Edit Your Sink
Moving Objects
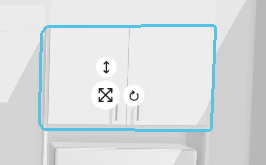
Whether it's cabinetry, appliances, tables, or flowers - you are going to want to move things. To move an object, simply click on the object you'd like to move (or if you'd like to move multiple objects, hold Ctrl + click on the objects), and you'll see these buttons:
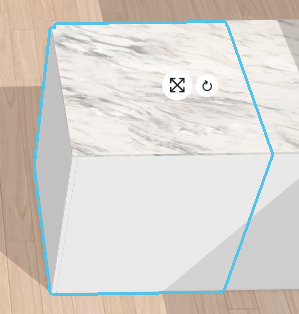
Simply click and hold the button on the left to drag and drop your item to its new place.
To rotate, click and hold the button on the right and swing the object whichever way you like. Note that the object will often snap into position to create straight angles.
For objects that can be elevated, use the arrows pointing up and down (as seen below) to adjust the height.
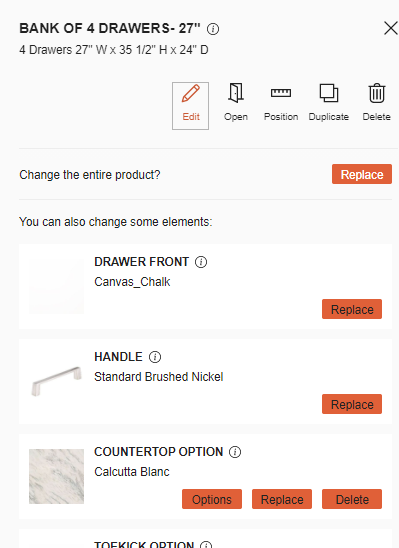
Editing Objects
Looking to change your door fronts, countertops, handles, or gables? Simply click on the object you'd like to edit, then click on the "dit" button on the left-hand side.
From there, you will be able to Replace" any aspect of the object you've selected. The "Apply to all" button will implement your changes on all cabinetry.
Understanding Our Product Names
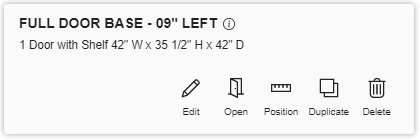
Our product names are made to be as concise and straightforward as possible. But by doing that, some aspects can get lost in translation. Lets use our standard full door base cabinets as an example.
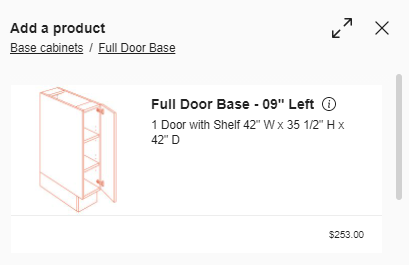
This product is named "Full Door Base - 09" Left".
- [Base] signifies that it is a base cabinet, which means they will be on the bottom (or, some would call it... the base!).
- [09"] is the width of the cabinet - you will notice that our tool is set up to order the cabinetry from smallest to largest, in 3-inch increments.
- [Left] is the side the hinges are on - it is important to note that sometimes, such as in this example, the drawings are not accurate to the side the hinges are actually on.
The Position Tool
The position tool is a handy way to make sure everything is spaced out exactly how you want it to be. To use it, just click on the object in question, bringing up this box.
From there, just hit the "Position" button, and you will see the measurements (as seen below).
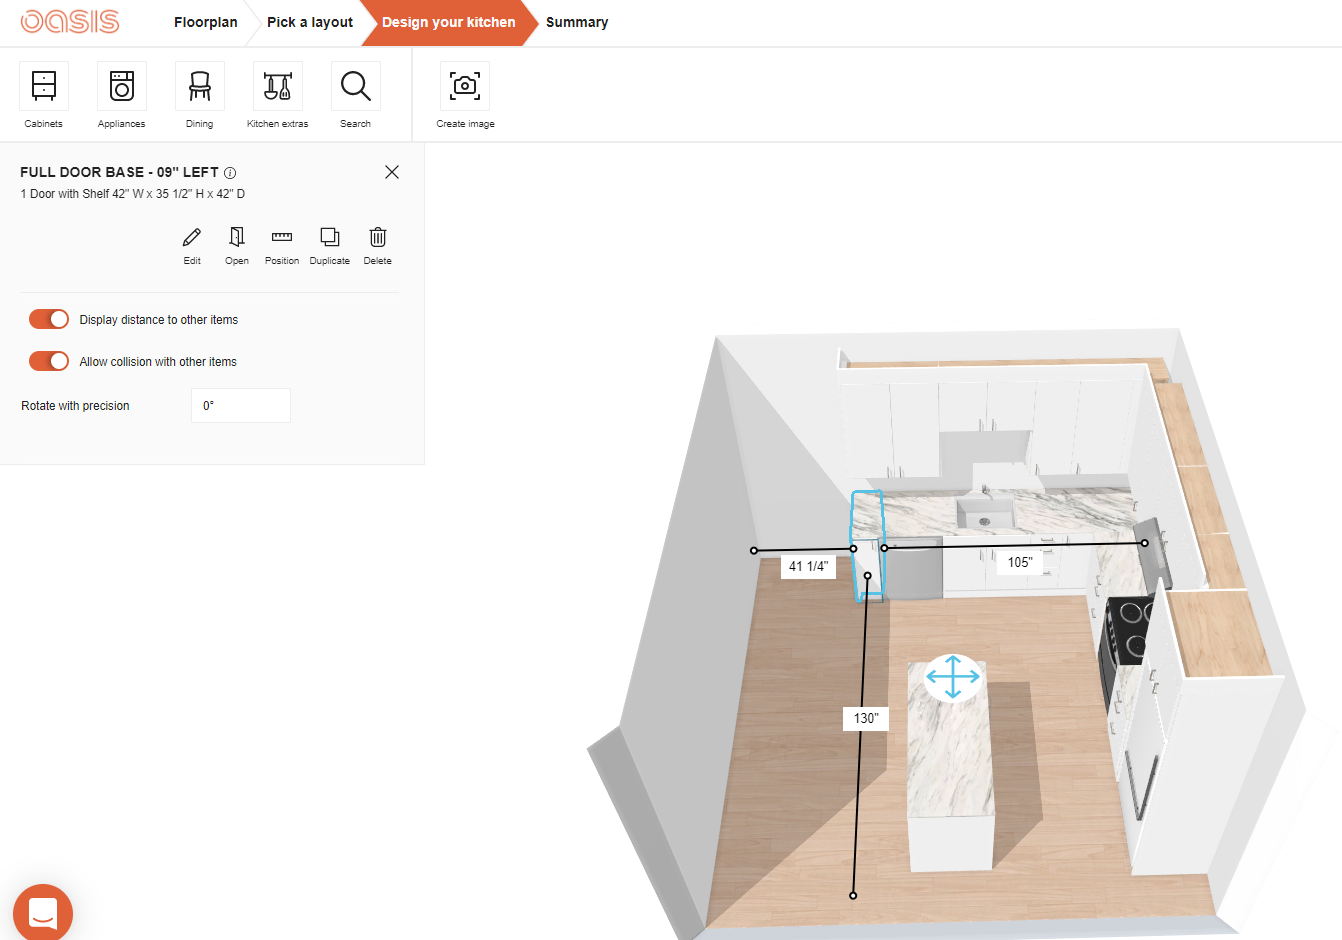
Some tips that go along with using the Position tool:
- Use the Ctrl (or Command on Mac) button to select multiple objects. This is especially useful for cabinets that are attached, such as islands.
- To get the perfect even spacing, you can edit the numbers themselves that pop up in the position tool instead of continuously dragging and dropping.
And that should just about cover the basics! If you have any further questions, please reach out - we are here to help!